
The Heart of the Home
Our relocation from the big smoke to Bulli is largely about a creating a life that is richer in time, health, connection, creativity and regeneration. Many of these dreams flow from the nexus of kitchen and garden - growing, harvesting, cooking, composting, preserving, storing, trading and of course, eating. One problem - our kitchen was pretty basic, and we didn’t have much money to do anything about it.
Good Bones
What we did have were ideas, enthusiasm, access to a woodworking studio (at MakerSpace&Co), and luckily the bones that the kitchen did have were pretty good. So enter stage right - DIY kitchen upgrade!
We decided to take the vinyl flooring up, sand the timber floors, keep most of the existing cabinetry, and build new elements around it.
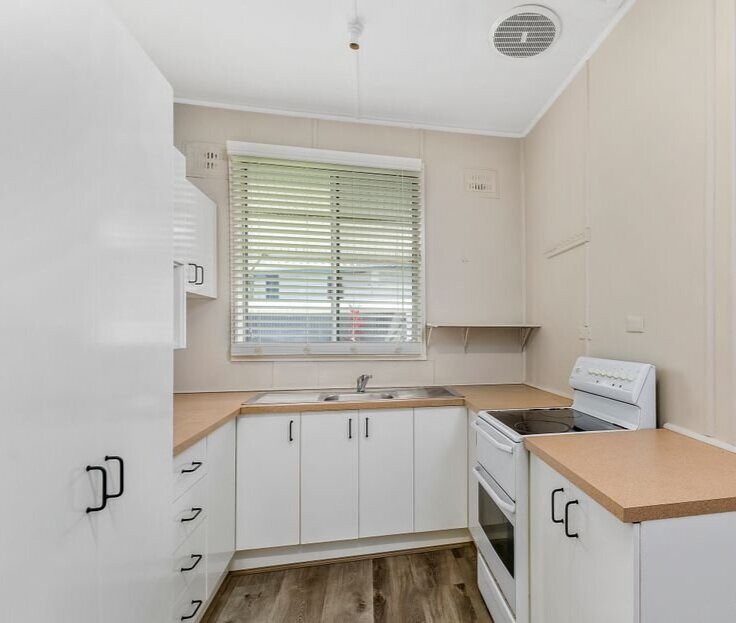
Here are some photos of the kitchen before work began and in the early stages of the upgrade:


The Vision
Our upgrade included the following:
removing the vinyl flooring and sanding the timber;
keeping most of the existing white painted cabinetry;
constructing new black formply elements around it, including a large floor to ceiling shelving unit at one of the room to accommodate the fridge, microwave, jar storage, pickling and sourdough stations, and an appliance bench;
installing a new dishwasher where the oven was;
installing a new oven where the fridge used to be (freestanding electric oven with induction cooktop to work with new solar system in the coming months);
replacing existing benchtops with new plywood timber benchtop (to tie in with the formply) with a white laminex top surface;
making a new hand screen printed plywood mini splash-back; and
painting the remaining walls white.
Apart from the floor sanding, electrics and plumbing, we did everything - ie design, demolition, construction, screen printing, installation etc.
Work in Progress
Here are some photos of the upgrade underway:


Lessons Learned
All in all, it all went relatively smoothly. There were some minor hiccups, such as discovering half of the floor was concrete rather than timber (which we didn’t mind so much). The result is a kitchen that is highly functional, has ample storage, is reasonably durable, and is certainly the heart of the home.
I learned a lot about basic joinery, and got a lot of satisfaction out of planning and building the new kitchen. I learned new skills, as well as current limitations - the initial plan was to make adjustable shelves with holes and brass pins, though after some trails I realised that the precision required was a step too complicated for me at this stage. I learned how to apply laminex to a surface and cut it to size, and I learned that I wouldn’t attempt a project like this without a table saw. Having access to the tools, equipment and helpful advice from the team at MakerSpace&Co made the whole project possible (thank you Kris, Brianna, Elen and Ollie!).
The Result
Here are some photos of the finished kitchen:


Cost
10 sheets of formply and screws - approx. $1000;
benchtop (1 sheet 25mm plywood, 1 sheet laminex, concrete cement, router bit) - approx. $200;
splashback - approx. $40;
floorsanding (part of a bigger project) - approx. $500;
new dishwasher (including installation) - approx. $1000; and
new freestanding Bosch oven with induction cooktop (including installation) - approx. $3000.
The whole project was under $6000, which is not nothing, but is still much cheaper and more sustainable than a brand new kitchen, particularly considering a large proportion of this cost was the new oven and dishwasher.
Now for some pickling!
_
Written by Suzy, January 2020